
Update: Since I first wrote this, I’ve tied several of these flies for myself and my father. I’ve had good success with them. I’ve also improved my process. The simplicity of the design allows for variations and it’s relatively easy for beginners to grasp the basics of fly tying. ~JTR, Jan. 2, 2018
Early 1990s, a log cabin in the Pocono Mountains — My father sits like a statue, his eyes pin-hole lasers on the small contraption in front of him. A tiny hook gripped in a vice, a felt-lined wood utility box, drawers and compartments overflowing with pheasant feathers, swatches of deer hair and threads like soft intestines from a gutted fish.
I often liked to watch my father tie flies that he would then cart of in a little metal box to catch trout. Sometimes, he would come home with a bag full of fish and our family would have trout almondine for dinner (here’s a basic recipe from Food Network).
Fish or not, the attention to detail required to tie flies, and how that meticulous nature eventually lends itself to improvisation, always captured my imagination as much as fishing itself.
So when my wife this year gave me a basic fly tying kit for my birthday, my mind raced with the possibilities. After getting the hang of the basics, I decided to tie a semi-realistic mayfly adult.
Here are the steps that will help others tie this fly.
Materials: Olive green 6/0 thread, size 8-12 dry-fly hook, duck quill, two single deer hair threads, 1/16″ green foam cylinders, brown neck hackle feather
Tying steps:
1. Wrap the olive thread down the hook shaft to the start of the bend.
2. Tie in one end of the green cylinder tightly. The foam cylinder will be used to make the body.

3. Tie in the deer hairs at the bend to form the mayfly’s characteristic tail fibers. In order to get them to stick out in opposing directions, it might be necessary to tie the left tail fiber to the right side. You should hold them in position while you make the wraps.
4. Wrap the thread back up the hook shaft to where the body will be finished and the wings started, and allow the bobbin to hang. Next, wrap the foam cylinder around the shaft to form the body, starting with a tight wrap, then slowly loosening the wrap tension so that the foam tapers wider the way an insect body does. At about 2/3 of the way up the shaft, tie the foam cylinder off and clip the excess.
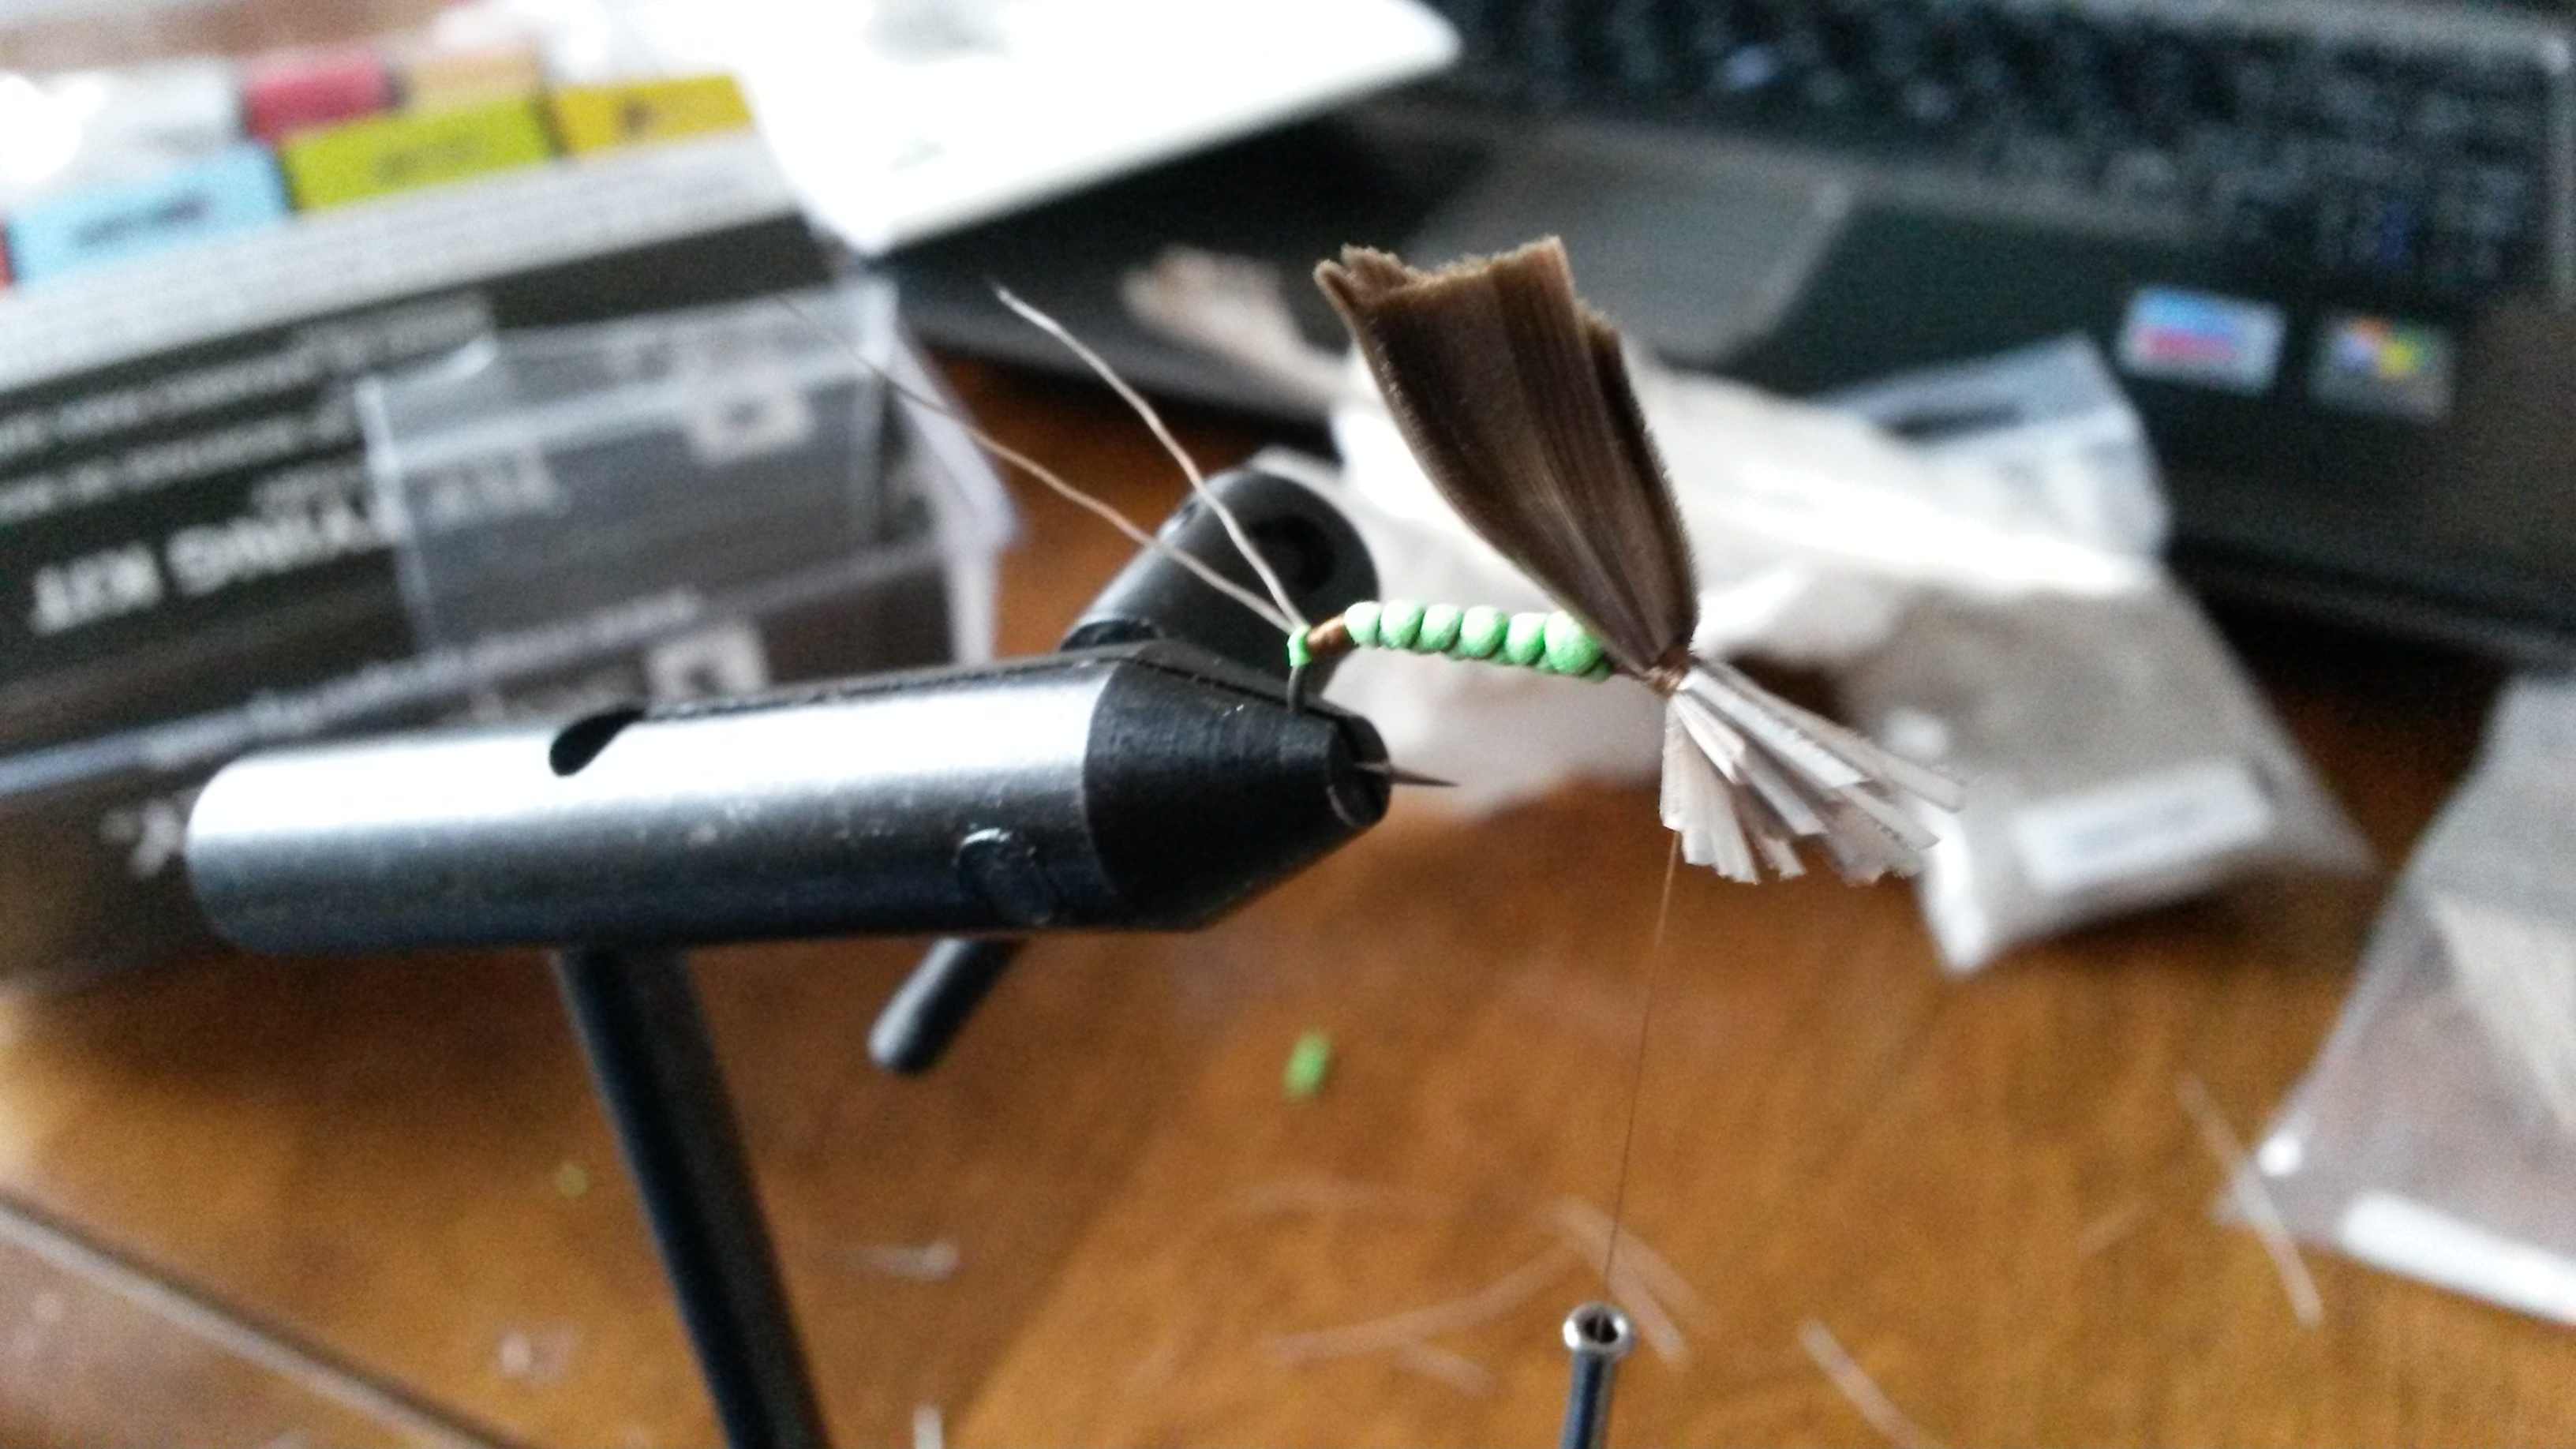
5. The wings – I used black duck quill for the wings because they stay together well and approximate the wings of a mayfly. Clip two quarter-inch segments of the quills from the feather’s shaft. I used the quills at the top to keep them short. Tie each wing onto the body separately at an angle, then figure-8 wrap the entire setup to keep the wings separate. Trim the excess quill at the wrap site.
6. Although a mayfly doesn’t have a hairy lions mane, it’s necessary to have a hackle on this fly to keep it afloat in a natural position. I used brown hackle, attaching it in front of the wings, and making a turn or two behind them, before winding it out in front and tying off the end, then trimming the excess.
7. Build a modest head to the hook eye, concealing the material ends. Whip-finish the thread and cement it well to give the fly permanence. I also added a few beads of cement to the thread that tied in the foam and tail to add stability there. Depending on the type of hackle you used, it might be too long and probably worth trimming it evenly so the fly sits better on the water.
As I mentioned, I’m new to fly tying, but I think this is one of the sounder designs. However, I realize it isn’t perfect and would love to hear your input. Please let me know what you think in the comments.

Check out author Todd Bruce’s new release “Nine Passes” Fly Fishing through the Past and Present of the High Sierras”–seems like you might enjoy it!
(http://www.amazon.com/Nine-Passes-Fishing-through-Present/dp/0991450329/ref=sr_1_1?ie=UTF8&qid=1424118064&sr=8-1&keywords=nine+passes)
LikeLike