By Jim T. Ryan, Hooligan-in-Chief

So you bought a very basic, fully-adjustable harness to get you started in rock climbing, but it has no gear loops.
Even if you’re just top roping at the gym, you need someplace on your harness to keep your belay device, tape and a chalk bag. Later, you’ll need extra carabiners, cams, nuts, etc. Eventually you want gear loops.
But here’s the problem: you’re on a budget and buying a second harness is not a priority. What do you do?
I tried just clipping gear to the back of my harness along with my chalk bag, but that was a pain to get off quickly and lacked good organization.
I started thinking there might be a way to add gear loops to my harness, but everything on the Internet either pertained to adding extra to a harness with loops or involved physically altering the harness with the caveat “it might work or you might die when your harness fails.” That sounds like a shitty option.
So I came up with a simple but effective way to add gear loops without compromising the structural integrity and safety of the harness. Here’s the narrative and several photos from my modification.
Materials:
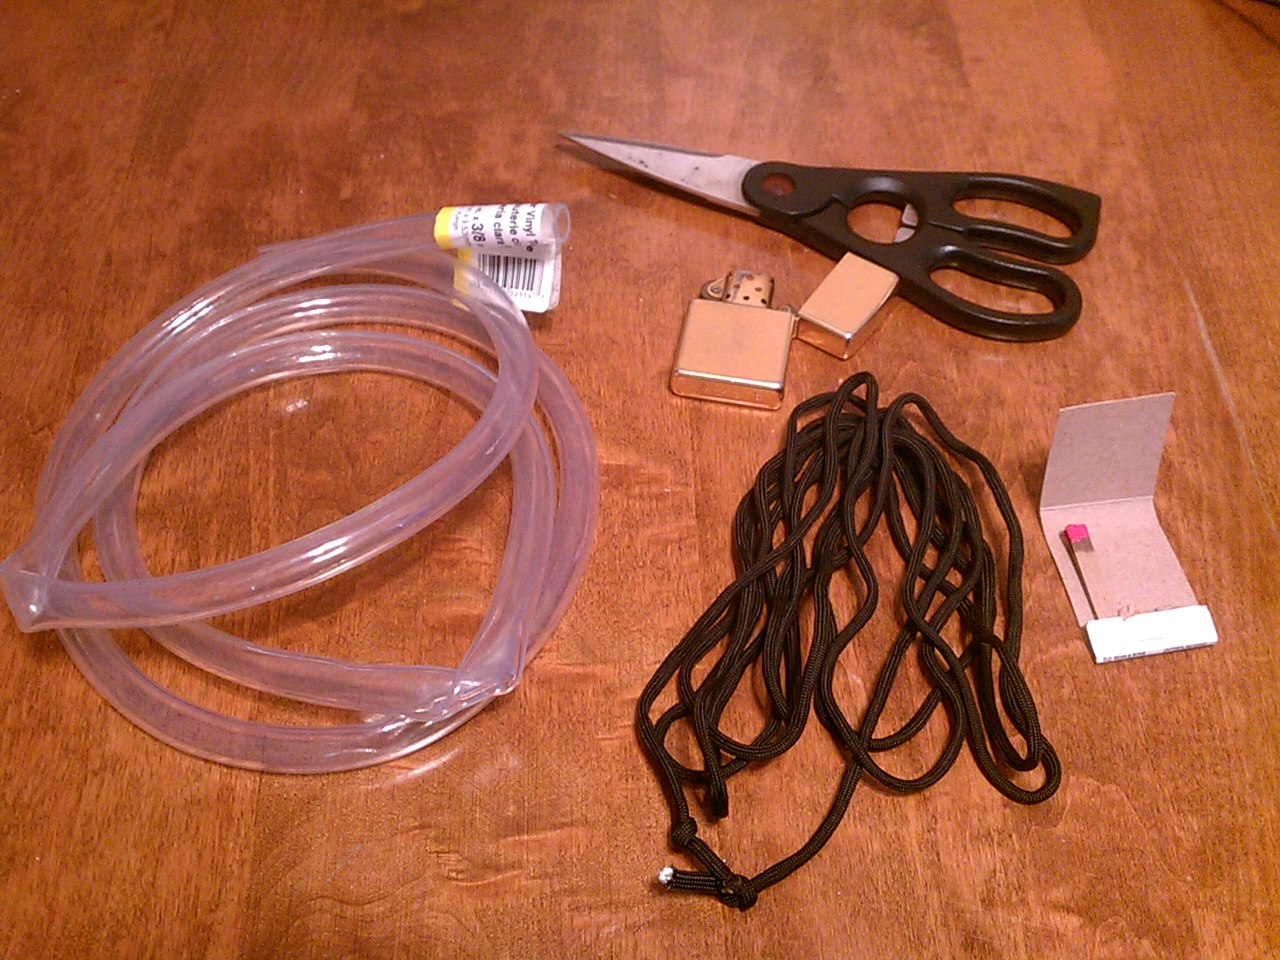 |
| Everything you need to make gear loops. |
- About 12-14 feet of 3 mm, 550-lb.-test paracord or similar strong utility cord for climbing. You need about 4 feet for each large gear loop and 2 feet for one smaller loop. That’s 10-12 feet with extra for screw-up factors.
- About 20 inches of 3/8 to 1/2-inch diameter clear vinyl tubing, the kind you’d use for water pumps. This stuff is found at any hardware store in various length coils. Won’t hurt to buy 10 feet. Useful for many things around the house.
- Matches or lighter to melt cord ends.
- Scissors or sharp knife to cut vinyl and cord.
The how-to:
- Cut paracord into one 2-foot section and two 4-foot sections (or three 4-foot sections for three large gear loops). Use matches or lighter to melt the cord ends away from your harness so as not to damage it accidentally.
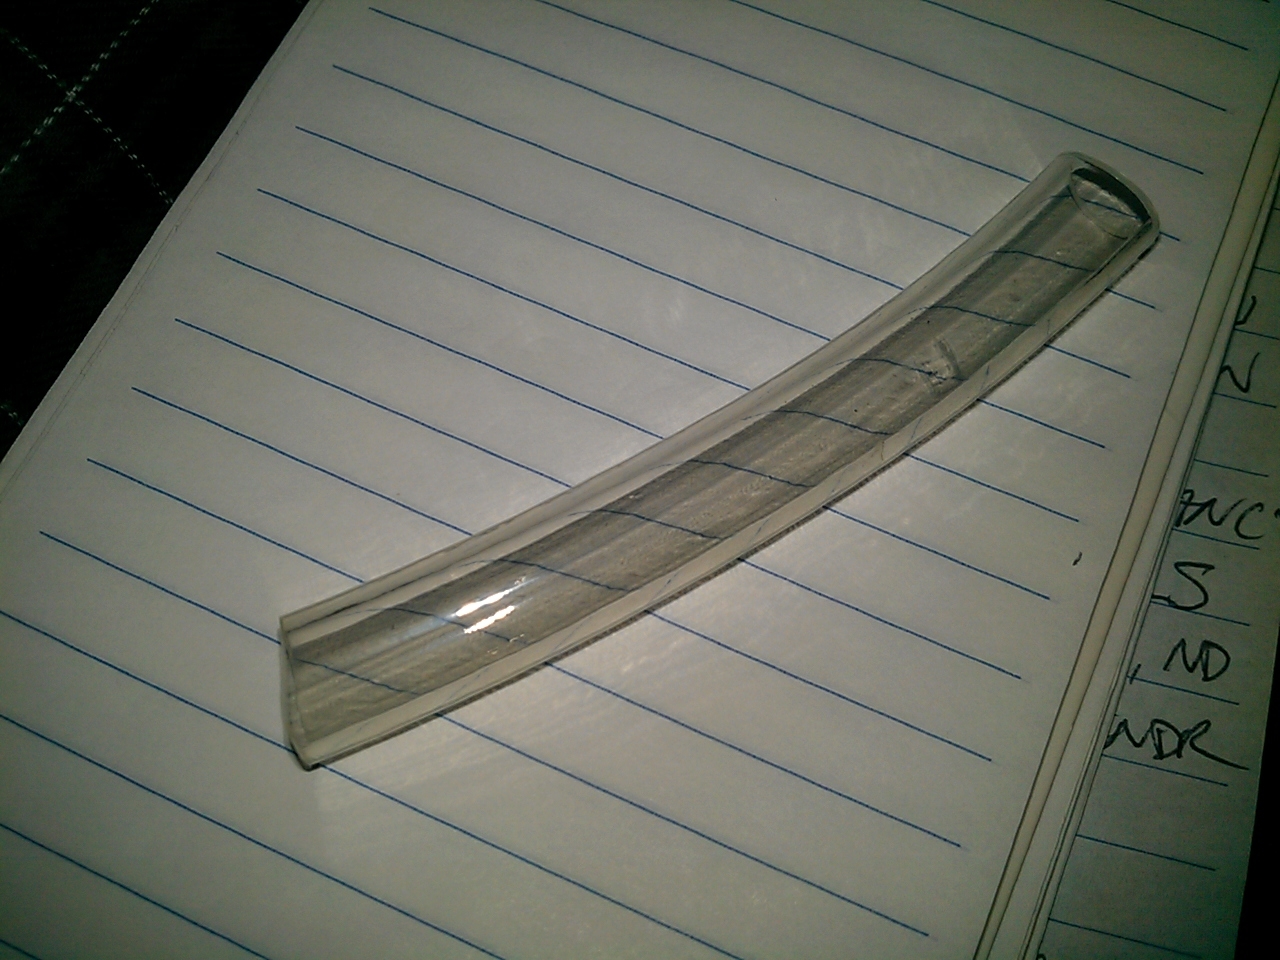 |
| Vinyl tubing. |
- Cut vinyl tubing into a 4-inch and two 8-inch sections (or three 8-inch lengths for three large loops).
- To start the small loop, find the center back of your harness and halve the 2-foot cord over the harness’s belt at the top so you have two equal-length strands hanging down. Keeping the cords tight to harness belt and tie an overhand knot pushing it tight to below the harness belt. The knotted loop around the belt should be just loose enough to move without significant friction on the belt. (Alternately: if you use longer cord, you can use a girth hitch to start and end, which doubles the cord on the belt at the beginning and end – See large loop instructions, below.)
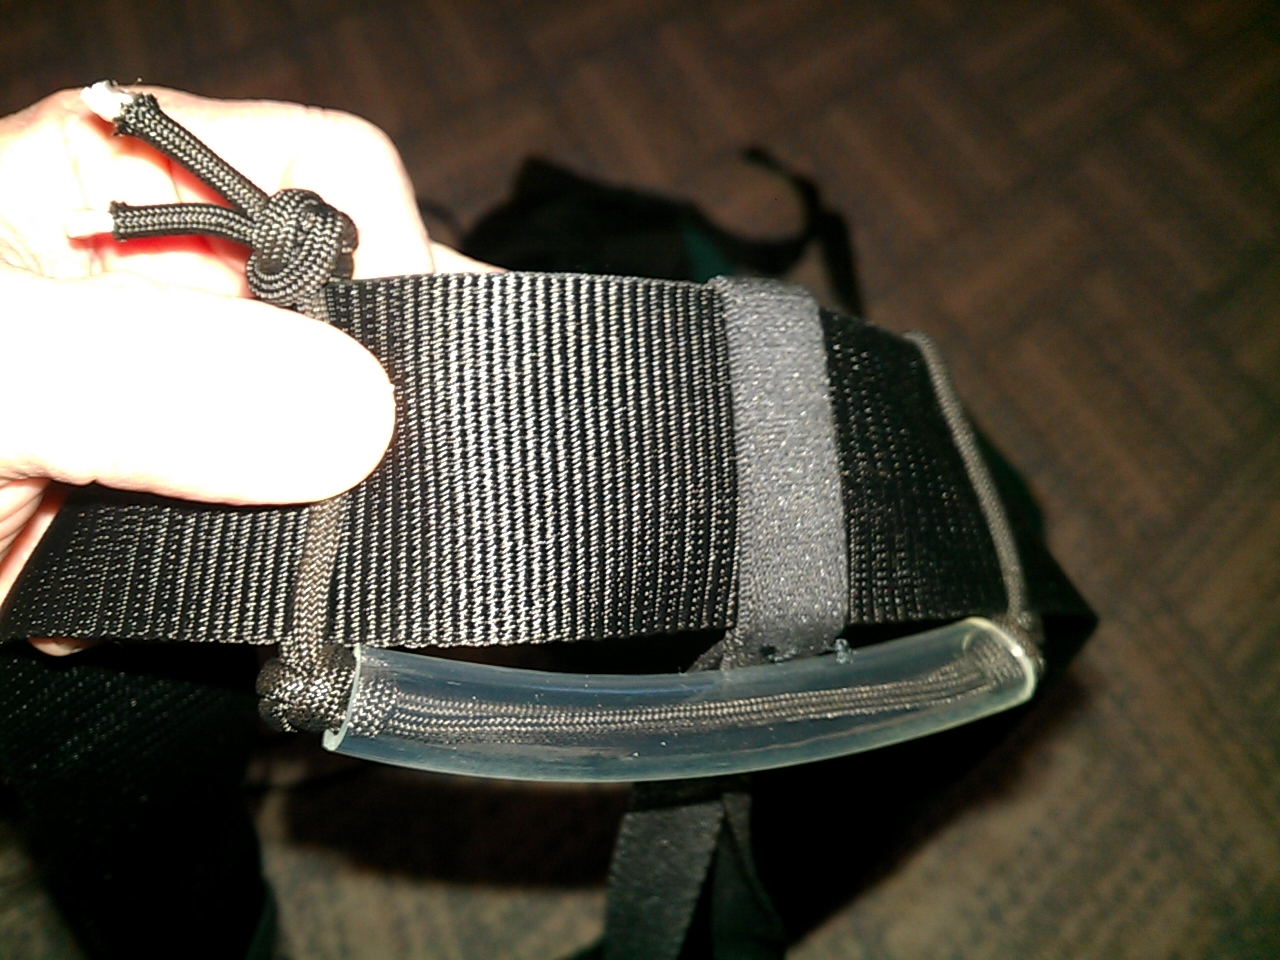 |
| Finished small back loop. |
- Slip the vinyl tube over both strands and slide it tight to the knot. Tie another overhand knot with both cords to hold the tube in place. Then split the cords around the harness belt and tie a final overhand knot at the top to complete the loop’s attachment to the harness.
- To start the large loops, fold one 4-foot cord section into equal halves and place the bight on the inside of the harness belt bringing it over the top and passing the working ends through for a girth hitch. Tie an overhand knot tight to the girth hitch.
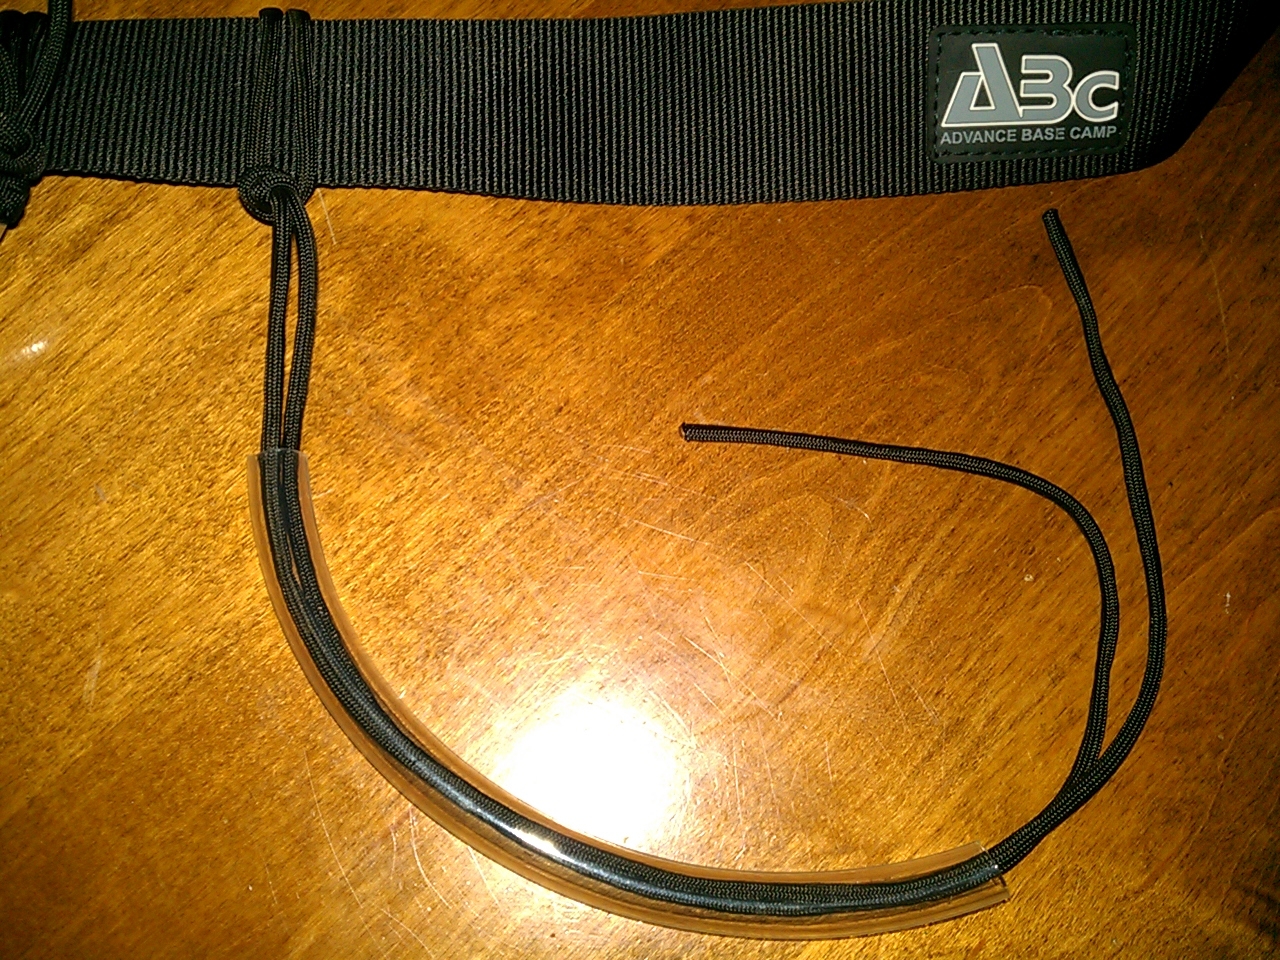 |
| 8-inch vinyl tube over paracord for a gear loop. |
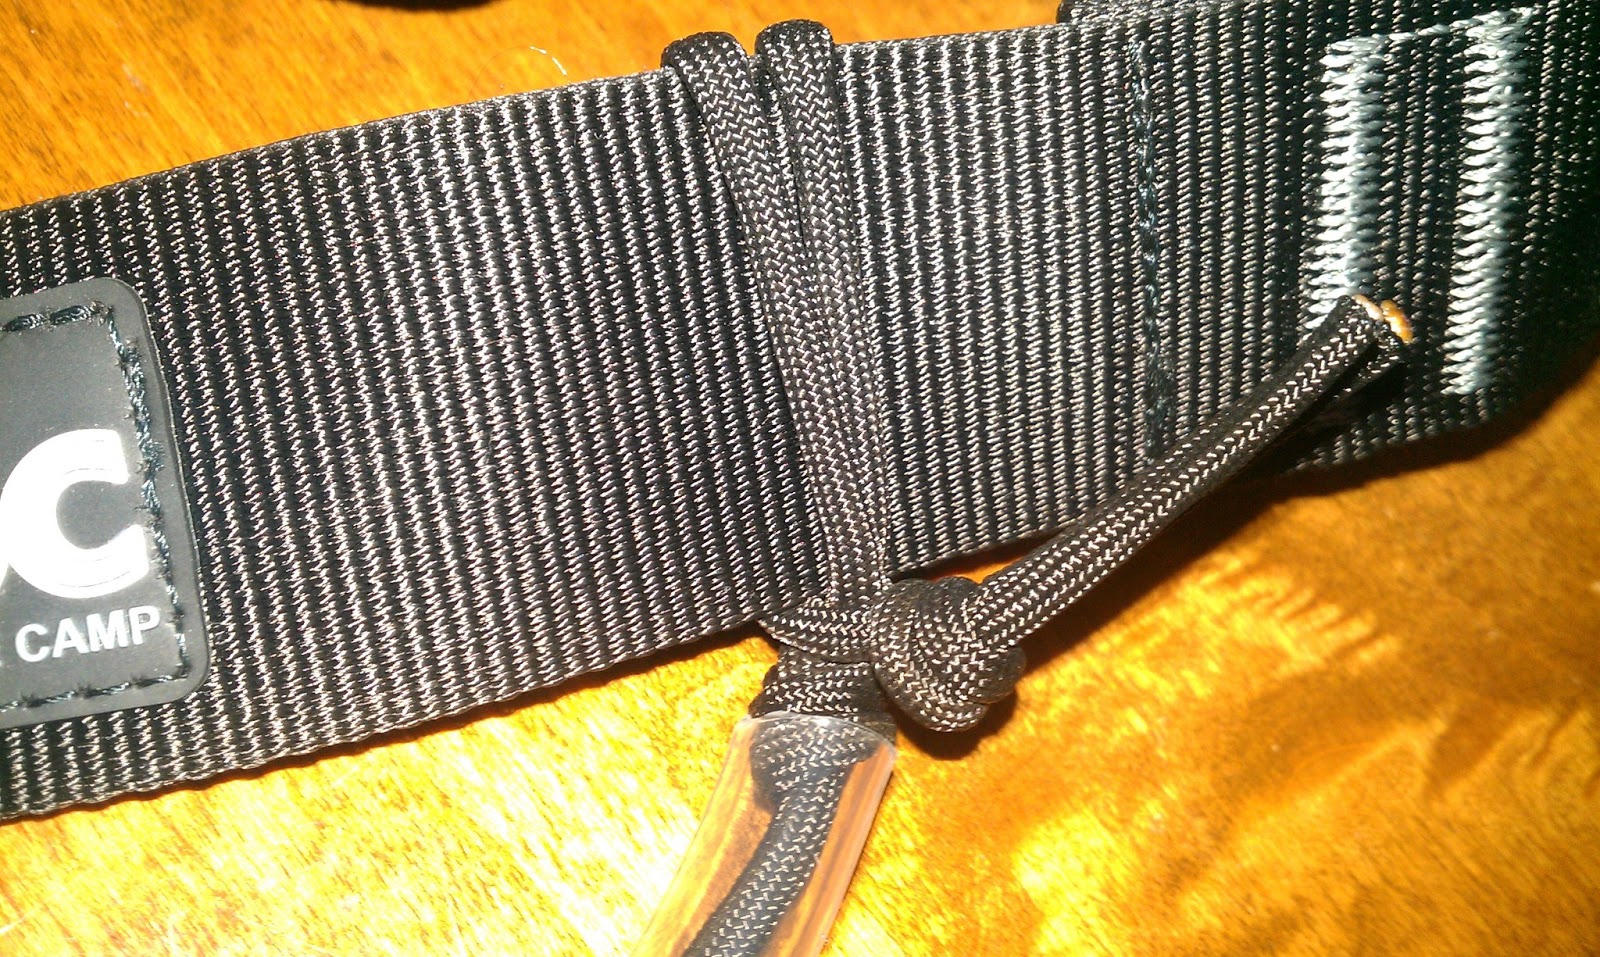
- Slip an 8-inch length of vinyl tube over both cords. Tie another overhand knot with the cords to lock the tubing in place. Then bring the working ends up over the harness belt and down behind, pulling the tube and overhand knot up to the belt. Split the cords around themselves near the tube and knot, and tie another tight overhand to finish off the ending faux girth hitch. (See Close-up 2)

Close-up 2: Finishing the loop with a faux girth hitch.
- These makeshift gear loops can be taken off by untying one or two knots and easily moved to another location on your harness belt to balance weight or place gear in easily accessible locations.
- It saves you between $50 and $100 (or more) on buying a new harness, depending on what brand, model and type you were considering.
- By using a high-grade 3 mm paracord or climb-spec utility cord, you’ve added about 10 or 12 feet of good cord to your rack in case of emergencies. That’s not a lot, but could certainly be helpful.

I’ll immediately snatch your rss feed as I can’t in finding your e-mail subscription hyperlink or newsletter service.
Do you have any? Kindly let me know so that I may just subscribe.
Thanks.
LikeLiked by 1 person